Unity Normal Map Import Settings
Import a normal map, set its Texture Type to Normal map, then place it in your material's Normal Map slot. Unity expects Y+ normal maps, but its importer also provides a Flip Green Channel setting when the source uses a different convention.
Create a Normal Map for Unity
Generate a map, preview it, and use Unity's importer to verify its direction on your material.
Open Unity Workspace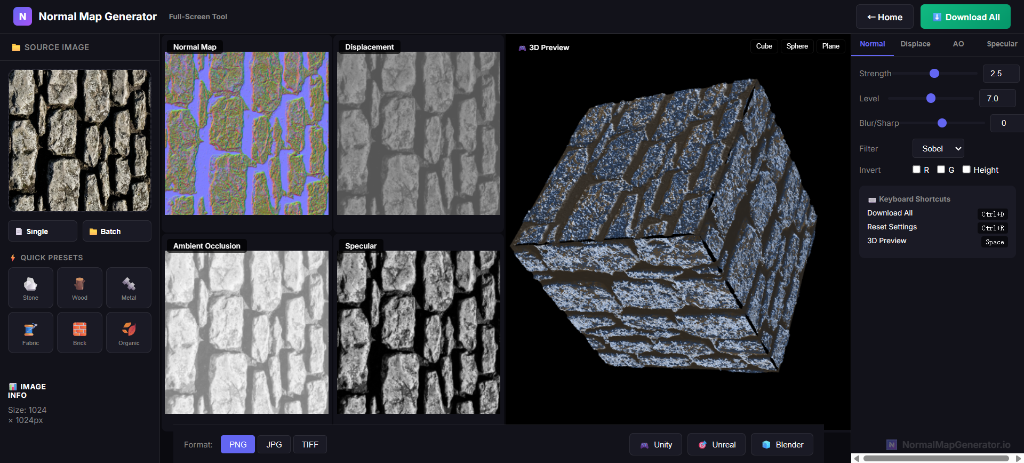
What is a Normal Map in Unity?
A normal map is a special texture that adds surface detail to 3D models without increasing polygon count. In Unity, normal maps are essential for creating realistic materials that respond to lighting correctly – adding depth to surfaces like brick walls, wood grain, or metal panels.
Unity uses Y+ normal maps, often called the OpenGL convention. Modern Unity import settings also include Flip Green Channel for a source that uses another convention.
Step-by-Step Guide: Creating Normal Maps for Unity
Visit the free normal map generator in your browser. It processes the source on your device and gives you a 3D preview before download.
Drag and drop your source image into the generator. You can use:
- Height maps (grayscale images where brightness = height)
- Color textures (the tool will analyze brightness variations)
- Photos of real surfaces
Start with the standard output. If lighting makes bumps look like dents in Unity, use either the workspace's green-channel control or Unity's Flip Green Channel import option—never both.
- Strength: begin modestly and compare under a directional light
- Green channel: flip only when the imported result proves it is needed
- Blur: smooth noisy sources before exporting when necessary
Use the real-time 3D preview to see how your normal map will look on different shapes. When satisfied, download as PNG format (recommended for Unity).
In Unity:
- Drag your normal map PNG into the Project window
- Select the texture and open the Inspector
- Set Texture Type to
Normal map - Click Apply
Create or select a material, then:
- Find the Normal Map slot in the material inspector
- Drag your imported normal map into the slot
- Adjust the normal map strength if needed
Unity Normal Map Best Practices
- Resolution: Match your diffuse texture resolution (1024x1024, 2048x2048, etc.)
- Format: Use PNG for lossless quality; Unity will compress during build
- Tiling: Ensure your source texture is seamless for tiling materials
- Testing: Always preview with different lighting angles in Unity
Common Unity Normal Map Issues
Normal map looks inverted or bumps appear as dents
The source may use the opposite green-channel direction. Flip the green channel once in either the workspace or Unity's importer, then test the material again.
Normal map looks flat or has no effect
Check that you've set the texture type to "Normal map" in Unity's import settings. Also ensure your material shader supports normal maps.
Ready to Create Your Unity Normal Maps?
Our free online tool makes it easy to generate professional normal maps for Unity in seconds.
🎨 Open Normal Map Generator