How to Create Normal Maps in GIMP
GIMP (GNU Image Manipulation Program) is a fantastic free alternative to Photoshop. The best part? It comes with a built-in normal map generator that is perfect for indie game developers on a budget.
The Free Alternative
For years, Photoshop was the only professional choice for texture work. But GIMP has matured significantly, and with version 2.10+, it includes native support for generating normal maps without needing to install any sketchy 3rd party plugins.
Step-by-Step Guide
1. Open Your Texture
Launch GIMP and open the image you want to convert. A square, seamless texture is best (e.g., 1024x1024).
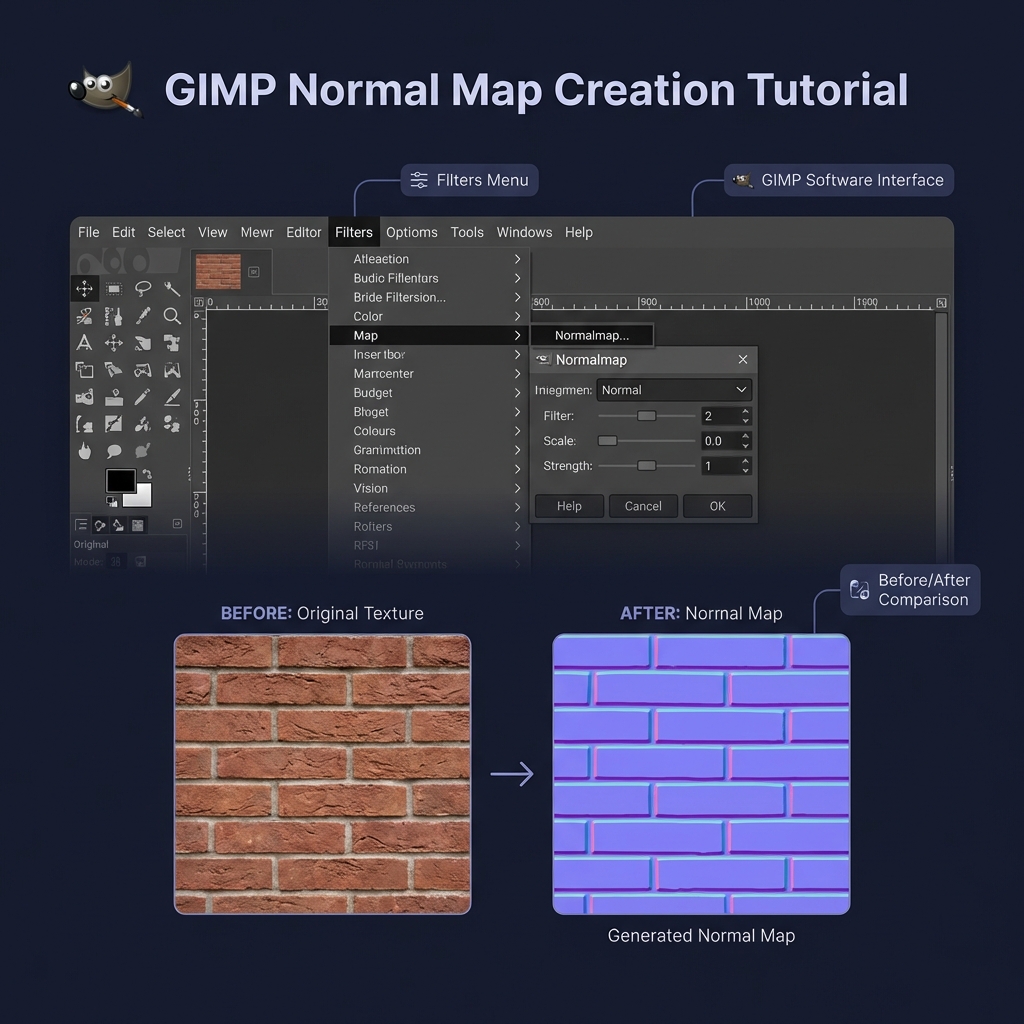
2. Open the Normal Map Filter
Navigate to the menu bar: Filters → Generic → Normal Map...
Note: If you don't see this, make sure you have updated GIMP to the latest version.
3. Adjust Settings
A dialogue box will appear with a 3D preview window.
- Scale: This is the strength of the bump. Increase it for deeper details.
- Filter: Consider using a Prewitt or Sobel filter for cleaner edges (Sobel 3x3 is a good standard).
- Flip Y: If you are using Unity, keep this unchecked. If you are using Unreal Engine (DirectX), check Flip Y!
4. Export
Click OK to apply the filter. Your image will turn purple. Now go to File → Export As... and save it.
Pro Tip: Save as TGA or PNG (uncompressed) to avoid compression artifacts that can ruin normal maps.
Want a Faster Way?
GIMP is great, but opening a heavy editor just to convert one image can be slow. Try our instant online converter.
Use Online GeneratorGIMP vs Online Tools
When should you use GIMP vs an online generator?
- Use GIMP when: You are already editing the texture, need to combine layers, or paint custom details.
- Use Online Tools when: You just need to quickly convert a file and want an instant 3D preview without loading slow software.